This is default featured slide 1 title

Go to Blogger edit html and find these sentences.Now replace these sentences with your own descriptions.This theme is Bloggerized by Lasantha Bandara - Premiumbloggertemplates.com.

This is default featured slide 2 title

Go to Blogger edit html and find these sentences.Now replace these sentences with your own descriptions.This theme is Bloggerized by Lasantha Bandara - Premiumbloggertemplates.com.

This is default featured slide 3 title

Go to Blogger edit html and find these sentences.Now replace these sentences with your own descriptions.This theme is Bloggerized by Lasantha Bandara - Premiumbloggertemplates.com.

This is default featured slide 4 title

Go to Blogger edit html and find these sentences.Now replace these sentences with your own descriptions.This theme is Bloggerized by Lasantha Bandara - Premiumbloggertemplates.com.

This is default featured slide 5 title

Go to Blogger edit html and find these sentences.Now replace these sentences with your own descriptions.This theme is Bloggerized by Lasantha Bandara - Premiumbloggertemplates.com.

Selasa, 26 Januari 2016

More Information Call


PT TESTINDO

JL. Radin Inten II no. 61 B Duren Sawit, Jakarta 13440
Mobile / WHATSAPP:  0813 9929 1909
PIN BB:  580EC93D
Phone. 021-29563045
Fax. 021-29563052
Email: sales@testindo.com
Website: www.testindo.com

Minggu, 17 Januari 2016

Inspecting Welded Tube

Inspecting Welded Tube

  • 85 plus years of experience
  • Superior test systems
  • Knowledgeable fieldstaff
  • In or off-line NDT equipment
  • Eddy current
  • Ultrasonic
  • Flux leakage
  • Custom systems
  • Material Handling


 Factors Influencing Test Methods


weld-line crackSome weldline cracks, such as this one shown above, may be detected by both eddy current and ultrasonic equipment.
NDT System in IndiaFactors that influence system selection include the capabilities and limitations of each technology, as well as the diameter, wall thickness, tube condition, and throughput speed of the product under test. Where the test is applied in the manufacturing cycle also influences the choice of method and apparatus. This can range from tests limited to the heat affected zone on the weld mill with perhaps an in-line anneal, to full body inspection of cut lengths after drawing and annealing or other heat treating. Each test method has inherent capabilities and limitations that are different.


pinhole flaw Common Defects Detected

  Generally, for tube applications that require high throughput speeds, eddy current is the preferred method to detect small, short, incomplete welds,and some subsurface cracks in carbon steel or non ferrous tube. For full body tests, including the detection of long, continuous defects such as incomplete seam welds in tube, and inclusions, voids or cavities, ultrasonic test systems are recommended. Flux leakage systems are available to accurately detect longitudinal and transverse surface defects on the OD and ID of heavy-wall magnetic tubing.


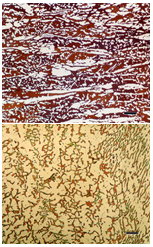
The picture above shows a short pinhole flaw that was detected by eddy current, but was difficult to detect using ultrasonic tests.


long weld defect for UT Weld Types

  The process of ERW and Induction welding is preferred for most carbon and alloy steel. Defects that may arise include all of those previously mentioned. TIG welding is a slow process usually used for stainless steel or titanium. Incomplete ID weld defects are a common concern in this process. Laser welding is a much faster process used for stainless steel, titanium, duplex and nickel alloys. Typical defects include very short pinholes, and long continuous ID defects such as incomplete or miss-match welds.

This picture above shows a cross section of a tube wall with a long, continuous poor ID weld that was detected by ultrasonic methods, but not by eddy current.


      DOWNLOAD PDF

Inspecting Tube Ends

Inspecting Tube Ends


The MAC Solution
    24
  • Fulfills API 5CT & 5L
  • Detects ID & OD longitudinal and transverse notches down to 5% of the tube wall
  • Detects lamination 6.2mm FBH
  • Measures wall thickness
  • Innovative Automated
    Pitch Control
  • Unique end plug cone follows unstraight tube ends
All NDT test methods have some limitation in regard to testing to the very end of a tube. These “untested
ends” must be cut off, resulting in a substantial loss of product and revenue, or the manufacturer needs to
develop a method to test these ends to meet the tube integrity requirement. Some industries require that the
end be tested to a higher level of integrity because it is being expanded, threaded, or welded in the field,
and end integrity is critical to the tube performance. MAC’s new UT End Tester provides a solution to this
problem.


25
MAC’s Echomac FD-5 electronics provide the
critical software for controlling the transducers
and receiving, adjusting, analyzing, and
reporting the test results.
26The Echomac® UT End Tester consists of two
independent, identical test stations designed to
inspect the untested portion of a tube end.
Generally this portion would range between 250
and 500mm from the tube end, depending on the
application.


DOWNLOAD Pdf

Inspecting Oil Country Tubular Goods

Inspecting Oil Country Tubular Goods

NDT in Oil and Gas Industry

Types of Oil & Gas Products include:

  • Line Pipe- (Larger diameter, relatively thin wall)
  • Drill Pipe- (Typically heavy wall seamless tubes)
  • Casing – (Mainly seamless but may be welded)
  • Sucker Rods- (In Cut lengths)
  • Umbilical Coils- (Small diameter, long length)
  • Other types of tubes- (Including coupling stock)
Note: Line pipe, drill pipe, casing, and other types of oil and gas tubes are best inspected using flux leakage & ultrasonic multi test systems. Whereas, sucker rods and umbilicals are best inspected using eddy current & ultrasonic multi test systems.

Common Applications Include:

  • Sour Gas
  • High Pressure
  • Offshore Wells
  • Arctic Wells
  • API grades for other wells

Methods of Production Include:

  • Welded- (Scarfed & Annealed for flux leakage)
  • Seamless

Inspecting Oil Country Tubular Goods (OCTG) 

With over 85 years of experience, MAC has a wide variety of custom designed systems for the inspection of oil country tubular goods (OCTG) and other oil and gas products that not only meet individual client specifications, but that of API 5CT and 5L, ASTM, and ISO.
23MAC’s highly trained and knowledgeable engineers, field staff, and representatives provide superior NDT equipment, services, and training worldwide.
MAC’s Rotoflux® flux leakage and Echomac® ultrasonic inspection systems are the best suited for inspecting heavy wall pipe for wall thickness variations, laminations, longitudinal, transverse, ID/OD, and internal defects. These rotary systems are designed to inspect pipe up to 500mm in diameter.
MAC eddy current systems such as the Multimac® and the Minimac® 40 are also available for thinner wall pipe.
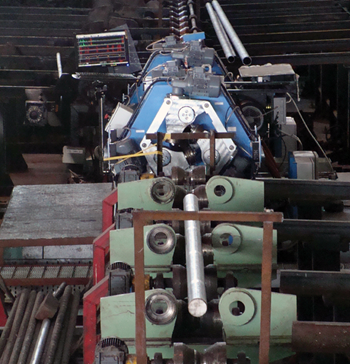
mage above is an inline ultrasonic rotary test system designed to test carbon steel tubes for longitudinal and transverse defects as well as wall thickness and lamination. The system includes the seal-less designed ultrasonic rotary mechanics developed to minimize maintenance especially due to dirt accumulation from hot rolled product. Coupled with the rotary is the Echomac® electronics which provides all the channels necessary in one computer cha
ssis. The rotary head is mounted on a Triple Guide Roll Test Bench which is highly automated to provide fast changeover times and consistent product throughput, and is extremely durable; thus able to withstand the                                                                                                                        
heavy demands of OCTG plant conditions.
The combination of an ultrasonic and eddy current NDT system allows for the detection of incomplete and mismatch welds, pinholes, leakers, and weepers in small diameter, long length umbilical coils. For sucker rods, which are hot rolled, cut length carbon or alloy steel, complete automated systems including encircling and spinning probe eddy current for surface and near surface defects, and ultrasonic rotary for internal and subsurface defects are available.

DOWNLOAD pdf

Inspecting Finned Copper Tube

Inspecting Finned Copper Tube

Industries:
  • HVAC
  • Refrigeration/Appliance
  • Electronic Cooling
    13
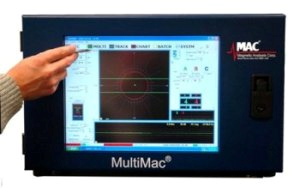
    MultiMac with built-in Display
Equipment:
  • 2 Channel MultiMac®
  • MID- MagneticInclusion Detector
  • CP 10
  • “ZZ” Magnetic Dual Coil
  • 3500 Pinch Stand
Defects:
  • Surface, ID & OD
  • Splits
  • Broken Discs
  • Metal Incrustation
  • Inclusions
  • Tears
  • Pin Holes

Metallic inclusions in copper tubing may appear from two major sources.   The first one comes from the material itself which can contain residual impurities from continuous casting.  The second and major source of metallic inclusions in copper finned tubes occurs during the manufacturing process. They can appear in the tube when the tool used to make the fins is breaking.  Small particles of metal (tungsten) make inclusions on the OD or even through the wall.  This leads to potential leaks when heat exchanger tubes are mounted in the shell.  Metal inclusions such as filings from finning tools can be as small as 3 mg.
Therefore they are not commonly detected by using a simple eddy current coil.  In this instance a Magnetic Inclusion Detector (MID) must be introduced to the system for better results.
In order to detect such small inclusions, the MultiMac electronics uses a second channel connected to the second half of the coil sensor consisting of a single absolute winding located in the DC field and generated by the two permanent magnets.

Download PDF

Inspecting Billets

Detecting Sigma Phase

Detecting Sigma Phase

15.pngDownload PDF
·         2507 Duplex Stainless Steel Tube ·         80 FT Cut Lengths

·         3/4″ OD with .083″ Wall Thickness
·         Detects Sigma Phase as Small as 2.6% of Tube Wall Cross Section
·         2 Channel MultiMac® Eddy Current Tester- Offline
·         2 Varimac® Comparator Coils
Description: Sigma Phase is a brittle, nonmagnetic phase of tetragonal structure occurring in many transition metal alloys; frequently encountered in high chromium stainless steels. It results from a transformation of Delta ferrite in the alloy, creating carbides at the grain boundaries, which reduces the carbon and chromium content that normally provides strength and corrosion resistance in the metal matrix. Because the condition has significant length and is not a single point type defect, the standard, which is provided by the customer, is measured as a percent of the cross section of the tube wall or bar, using micrographic techniques. Some metallurgists believe that sigma phase commonly occurs at temperatures between 600°C and 900°C. Another cause of sigma phase is due to a malfunction of the high temperature furnace; causing the material to undergo an extended length of time in heat treatment.For the 2507 grade of duplex stainless steel, sigma phase may be resolved at temperatures above 1050°C through a corresponding annealing.

14


System: 

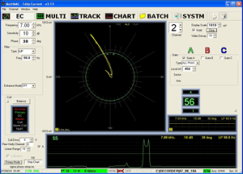
16The test consists of a 2 channel MultiMac® coil eddy current tester. 1 channel is used for the detection of typical defects, while the other channel is used for finding sigma phase; a condition caused from improper or extensive heat treatment.The second channel on the MultiMac is an absolute tester using two Varimac® coils. One coil is balanced on air and used to calibrate the equipment with a reference standard.
The other is the actual test coil installed on a CP 30 (Coil Platform). The system is mounted on a Dual Pinch Stand test bench and is comprised of a CP 352 for defect detection, followed by CP 30 for sigma phase. This system operates offline on cut length of 2507 duplex stainless steel tubes up to 80 feet in length, 3/4” OD, with a wall thickness of 0.083”.

1813

Coil Platform 352 on the left for defects followed by coil platform 30 towards the right for Sigm
a Phase.  Above is the MultiMac Electronics.

Demagnetizers

DEMAGNETIZERS

Demagnetizers are used in metal manufacturing plants to eliminate resid
Demagnetizers With and Without Water Coolin
ual magnetism in the test material after the eddy current test is
completed, or for similar applications where high speed reduction of residual magnetism is required. MAC Demagnetizers can handle bar, tube or wire material ranging up to 8.5″ (215 mm) diameter.


Models include:
  • Low Power for up to 1.75″ (44 mm) Diameter Light Material such as thin wall tube and small parts
  • Model 200 Demagnetizer – AC power only – Ambient Air Cooled
    • 1 KVA Power for 1.75″, 4.75″ or 5.75″ (44, 114, 146 mm) Diameter Material
  • Models 470/471 – Ambient Air Cooled
    • Medium Duty 4 KVA Power for 4.5″ (114 mm) Diameter Material:
  • Model 475 – Water or Air Cooled (Air cooled coils can be used on some thin walled tubing)
    • Heavy Duty 25 KVA Power for 3.75″, 4.75″ or 5.75″ (95, 114, 146 mm) diameter material – Requires continuous supply of water for cooling. Contact MAC for specific water and power requirements.
  • Model 400
    • Extra Heavy Duty 75 KVA for 7.5″ or 8.5″ (190, 215 mm) diameter material
  • Model 750 Demagnetizer. Requires continuous supply of water for cooling. Contact MAC for specific water and power requirements.
  • MAC’s experienced Field Engineers can recommend the most appropriate demagnetizing equipment for your applications.
Typical Application:
  • Used to eliminate residual magnetism in the test material after the eddy current test is completed, or for similar applications where high speed reduction of residual magnetism is required
PDF File: Demagnetizer.pdf
For Use With: Bars and Rods, Metal Parts, Tubing, Wire

Varimac

VARIMAC

VARIMAC® VI

The Varimac, latest in MAC’s line of eddy current comparators gives you fast, convenient sorting of metal parts such as fasteners, bearings, and other cold formed pieces. Its high speed continuous operation and reliability in production environments make 100% non- destructive inspection economically feasible. It is also used for checking alloy and hardness in bar or wire.
Typical Application:
  • Detect variations in alloy, hardness, some dimensions and certain types of cracks in metal bar, tube or parts. Also used for high speed sorting of parts such as fasteners and bearings. Used with MAC’s Parts Gates, parts can be sorted and counted at speeds up to six parts per second into three separate groups.
PDF File: VARIMAC VI.pdf
For Use With: Bars and Rods, Metal Parts, Tubing

AUTOSORT® SORTING SYSTEMS

Standard Parts Test System
MAC standard NDT parts testers usually utilize the Varimac V eddy current comparator with an automated parts sorting gate to separate parts into three categories – above specification, below specification and acceptable. The sort speed of the Varimac V instrument is only limited by the parts handling and sorting mechanism. Used in conjunction with MAC’s Model 570 gate system, for example, the Varimac provides reliable, 3 way sorting at speeds up to 6 parts per second, based on differences in alloy, hardness, case depth, grain size, processing variations, plating thickness, some dimensions and orientation.

Customized Parts Testers
Highly sophisticated customized parts testers using several test technologies and appropriate automated handling equipment have been developed and produced for inspecting shell bodies, grenades, bearing races, and automotive parts, among others.

Typical Application:
  • Inspect and sort for hardness, alloy, or other physical characteristics in metal parts.

RotoFlux

Flux Leakage Inspection Systems

Untitled1FLUX LEAKAGE ROTARIES

Magnetic Flux leakage (MFL) non destructive test systems accurately detect defects in heavy-wall magnetic tubing, including oil country tubular goods (OCTG), bars, and parts. Systems are available in sizes to handle up to 500 mm diameter and 19 mm wall thickness tubes. Transverse and Longitudinal rotaries detect surface defects as small as 5% on OD and 5% on the ID as well as defects within the wall, depending on material type and condition can be detected.

ROTOFLUX® ELECTRONICS

2The electronics are capable of differentiating between ID and OD defects, using a unique multiprobe feature which allows convenient operation at greater speed. A flux measurement circuit is included to indicate whether the test piece is properly saturated. To detect longitudinal defects, the material under test is driven through rotating headplates that include transverse magnetizing coils and test probes.MAC also offers Rotoflux systems to detect transverse defects where the magnetizing poles are placed in a fixed position perpendicular to the axis of the material under test, and the sensors are rotated around the test piece.

Production Comparator


PRODUCTION COMPARATOR


PRODUCTION COMPARATOR VI

A single frequency Windows® computer based nondestructive test instrument that uses low frequency electromagnetic techniques to inspect magnetic materials for variations in physical characteristics such as alloy, heat treatment and case depth. Highly selective gating circuit permits it to discriminate between changes in the signal’s phase, amplitude or harmonic distortion from the fundamental frequency to its 13th order harmonic. The instrument also features a unique display (vector or lissajou) that provides simultaneous display of the standard, acceptable piece and the test piece wave forms for easy comparison. Setup and monitor on site or through a computer network.
Typical Application:
  • Checking case depth, core hardness, alloy and structure in ferromagnetic tube or bar at production line speeds on line or off line. Three way sorting of magnetic parts automatically, when used with MAC’s automated Parts Gates.
PDF File: PCVI.pdf
For Use With: Bars and Rods, Metal Parts, Tubing, Wire

AUTOSORT® SORTING SYSTEMS

Standard Parts Test System
MAC standard NDT parts testers usually utilize the Varimac V eddy current comparator with an automated parts sorting gate to separate parts into three categories – above specification, below specification and acceptable. The sort speed of the Varimac V instrument is only limited by the parts handling and sorting mechanism. Used in conjunction with MAC’s Model 570 gate system, for example, the Varimac provides reliable, 3 way sorting at speeds up to 6 parts per second, based on differences in alloy, hardness, case depth, grain size, processing variations, plating thickness, some dimensions and orientation.

Customized Parts Testers
Highly sophisticated customized parts testers using several test technologies and appropriate automated handling equipment have been developed and produced for inspecting shell bodies, grenades, bearing races, and automotive parts, among others.

Typical Application:
  • Inspect and sort for hardness, alloy, or other physical characteristics in metal parts.

Minimac® 55

MINIMAC® 55

MINIMAC® 55

With the new Minimac® 55, you no longer have to sacrifice performance for price. This powerful, compact design is the first eddy current tester to offer the robust capabilities of our top of the line Multimac®, yet is much more affordable than you might think.
The Minimac® 55 features MAC’s proprietary Multimac® performance, operates at speeds over 4000 f.p.m, takes up less space, does not require cooling, and is offered at a price you’d expect to pay for a limited capability unit. Designed with software controls for all functions including phasing, filtering and sensitivity. Separate full-color polar and linear monitor display of real time, true wave form signals enables on-site or remote location review, end suppression and defect tracking. The Minimac® 55 can also be interfaced with any of MAC’s full line of coils, coil platforms and accessories.
Typical Applications:
• Detect short surface and some subsurface defects, including laps, slivers and cracks
• Test magnetic and non-magnetic grades
• Find weld line faults, including short ID or OD defects
• Check continuity and locate welds in single and multi-conductor insulated wire and cable
• Test cut lengths or continuous product, on-line or off-line
• Detect magnetic inclusions with MID version of Minimac®
Minimac® 55

Minimac® 50

MINIMAC® 50

MINIMAC® 50

With the new Minimac® 50, you no longer have to sacrifice performance for price. This powerful, compact design is the first eddy current tester to offer the robust capabilities of our top of the line Multimac®, yet is much more affordable than you might think.
The Minimac® 50 features MAC’s proprietary Multimac® performance, operates at speeds over 4000 f.p.m, takes up less space, and does not require cooling. Designed with software controls for all functions including phasing, filtering, and sensitivity, this single channel instrument is an excellent choice for dedicated, continuous production testing of wire and cable, where simple setup without the need for constant operator adjustment is desired. Separate full-color polar and linear monitor display of real time, true wave form signals enables on-site or remote location review and defect tracking. The Minimac® 50 can also be interfaced with any of MAC’s full line of coils, coil platforms and accessories.
Typical Applications:
• Inspect wire, tube and parts
• Test magnetic and non-magnetic grades
• Find weld line faults, including short ID or OD defects
• Check continuity and locate welds in single and multi-conductor insulated wire and cable
• Test continuous product, on-line or off-line
• Detect magnetic inclusions with MID version of Minimac®
MINIMAC50.PDF

Multimac

MULTIMAC

13MULTIMAC®

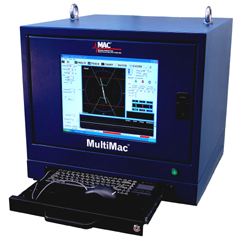
The versatile new MultiMac® lets you configure your eddy current test application the way you want – all with just one tester. MultiMac® test channels can be individually configured for use with encircling or sector test coils as well as rotating test probes – eliminating the need to have several instruments.
Yet MultiMac includes the best features of MAC’s individual encircling coil and rotary probe instruments. Features include up
to 8 test channels in any combination, and a broad test frequency selection from 1KHz to 5MHz. All test channels can operate simultaneously at the same or at different frequencies
MultiMac® can operate on a wide variety of non-magnetic products, or use Direct Current saturation systems to inspect magnetic material. Test speeds can range from one foot per minute up to several thousand. Installation can be in-line or at a separate test station. End suppression circuitry, when combined with an optional sensor can be used for testing cut lengths to prevent false signals from leading and trailing ends.
The instrument is packaged in a heavy duty cabinet that includes a built-in monitor, air conditioning, and pull- out keyboard. There is no need to access the cabinet interior during setup and operation.
The MultiMac® is also available in other cabinet configurations that do not include the heavy duty cabinet and built-in monitor. These models include output connectors for an external monitor, and can be housed in an environmental cabinet with air conditioning where needed.

Typical Application:
  • Defect detection in non-magnetic and magnetic bar, wire, or tube where multiple test channels and both encircling and rotary probe technology is desirable.
PDF File:  MULTIMAC.pdf
For Use With: Bars and Rods, Tubing, Wire

MULTIMAC®

12The MultiMac® SM is a high speed, computer with Windows® Operating System and MAC’s latest proprietary software. The instrument is packaged in a compact cabinet that includes a built-in touch screen monitor and may also be operated with a keyboard or mouse. The output connectors are included for an optional external monitor.With these features, MultiMac® SM can operate on a wide variety of non-magnetic products, or use Direct Current saturation systems to inspect magnetic material.The system has a broad test frequency selection from 1KHz to 5MHz. Test speeds can range from one foot per minute up to several thousand. Installation can be in-line or at a separate test station.MultiMac® SM has up to 4 test channels that can operate at the same or different frequencies for special applications. The main test display provides all the information needed to set up and operate MultiMac® SM. Polar and linear signal traces can be simultaneously displayed, along with all test parameters. User configurable reports containing customer and product information in addition to defect location, time, amplitude and phase can be stored locally or on a network server.
 Typical Application:
  • To detect short weld line defects, and long, continuous surface flaws such as laps and seams in magnetic and non-magnetic tube and bar.
PDF File: MULTIMAC SM.pdf
For Use With: Bars and Rods, Tubing

Echomac

Ultrasonic Test Systems

ULTRASONIC TESTERS TO DETECT SURFACE, SUBSURFACE AND DIMENSIONAL FLAWS

These ultrasonic NDT methods will indicate material defects such as longitudinal and transverse cracks, inclusions and others as well as ID/OD dimensions and dimensional changes such as thickness and ovality.

ECHOMAC® ROTARY
Transducer Assembly

High speed ultrasonic rotary testers provide multiple test configurations for tube or bar up to 500 millimeters in diameter.
ECHOMAC® Rotary Ultrasonic System Rotating ultrasonic transducers are available for shear-wave configuration (surface and subsurface defects) and compression-wave configuration (internal defects and dimensional measurements such as wall thickness.) Models are available for inspecting material from 10 mm to 360 mm in diameter at test speeds up to 200 fpm, depending on the size and condition of the material. Rotary ultrasonic systems can be combined with eddy-current instrumentation to meet API, ASTM, Mill, and Customer specifications.

Typical Application:
  • Used with FD-5 electronics for non-destructive testing of bars, tube and Pipe.

ECHOMAC® FD-5
Multi Channel Ultrasonic Tester

The Echomac FD-5 is a computer based ultrasonic inspection instrument designed for on or off-line flaw detection, thickness and outside diameter measurement.  Instead of using common spike pulsers, the FD-5 uses negative square pulsers lower in amplitude and longer in length coupled with a pitch-catch through transmission to fully optimize transducer efficiency.  Building on the success and wide acceptance of the Echomac FD-4, the FD-5 achieves a new level of improved signal to noise, repeatability and reliability.  Improved 16 steps damping adjustments in increments of 20 Ohms, instead of the common 2 step high or low adjustment, allows the transducer to detect lower signals while giving the user better control over reflections.  With a higher gain range and the addition of 5 low pass filters and 5 high pass filters, noise is significantly
suppressed, thus improving reliability and repeatability.  Zero cross-talk optimizes signal integrity and provides precise thickness measurement.

Typical Application:
  • Flaw, thickness or ID diameter detection on or off line, for tube, bar, or plate. Well suited for new or older installations in need of upgrading, the FD-5 instrumentation can be used with MAC’s Echomac Rotary Ultrasonic Transducer assembly as well as with other existing immersion or squirter type “spin the tube” installations.

Kamis, 14 Januari 2016

Magnetism Detectors

Magnetism Detectors

    11
  • nexpensive
  • Pocket Size
  • Light in Weight
  • Ruggedly constructed
Instruction Manual (Pdf.) 
Data Sheet (Pdf.)
To Indicate Residual Magnetism in Iron and Steel Objects
The Magnetic Analysis Magnetism Detector is widely used by steel suppliers and fabricators to indicate the degree and polarity of residual magnetism in ferrous products.
Easy to use, simply place the base of the indicating needle against the object you are testing. The needle indicator will move to a point on the scale that represents the strength of the magnetic field of the material (in gauss). The meter scale reads 20 units on either side of a zero center point, allowing for quick identification of the field’s polarity as well as the level of the magnetic field.
Full scale deflection is equal to approximately twenty gauss. When checking magnetized bar stock or tubing, a reading of 10 or less is usually acceptable. Each piece should be tested separately, however, so that the reading is not affected by adjacent parts.

Sensitivity & Calibration

Magnetism Detectors are calibrated prior to shipment, as signified by the sticker applied and initialed by a member of MAC’s Quality Control staff (does not come with a certificate of calibration). Calibration to a Level of +/- 1 gauss at 10 gauss is performed utilizing a calibration fixture, calibrated with a gauss meter which has been calibrated in accord with standards traceable to the N.I.S.T.
For those applications where the sensitivity of the instrument, as supplied, is of high significance, the full-scale reading (+/- 20) is obtained when the meter is subjected to a field whose known intensity is 20 gauss.
Price: $49.95 each
10 or more: $39.95 each
(Calibration Certificates are available for an additional $10.00 per unit)
*Prices subject to change without notice

PLEASE CALL 1 800 4NDT MAC (outside of U.S. 914 530 2000) TO ORDER.  THANK YOU.

Materials Handling & Accessories

Materials Handling & Accessories

Eddy Current , Ultrasonic and Flux Leakage inspection requires appropriate mechanics, controls and accessories to handle the test material and house the test sensors. MAC has designed a range of standard and custom handling systems that integrate mechanics with the test systems and production line to ensure the most accurate test results.

MECHANICS FOR MOUNTING TEST SENSORS

Rotary Mechanics for Eddy Current Systems

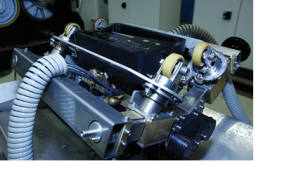
8Where rotating eddy current probes are being used, they are housed in a rotary headplate, mounted in rotary mechanics that include a motor for spinning the headplate with its test prob
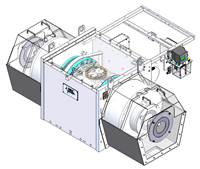
es around the material under test. Current rotaries feature continuously variable high speed rotaries (1800 – 6000 RPM), capable of handling test material up to 191 mm (7-1/2″) diameter.


Coil Platforms for Eddy Current Systems
Proper positioning of the eddy current test coil with respect to the material being t
ested is a key ingredient of any eddy current inspection system.
9
MAC Coil Platforms are:
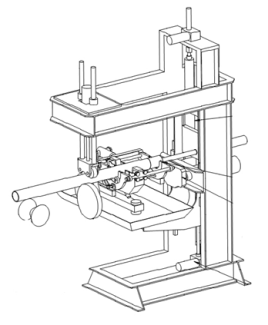
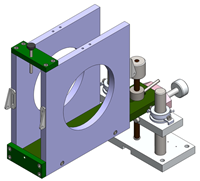
  • Adjusted vertically and horizontally for proper alignment
  • Encircling (throughput) or tangent (sector)
  • Designed for various applications, including:
    • cylindrical and shaped material
    • magnetic and non-magnetic material
  • Designed for sizes up to 235 mm (9.25″) diameter for encircling test coils
  • Sizes up to 304.8 mm (12.0″) diameter for sector (tangent) coils


10Rotary Mechanics for Ultrasonic Systems
MAC’s Echomac® UT Rotary rotates ultrasonic transducers for shear-wave and compression-wave configuration at high throughput speeds. Standard models handle material from 6.3 mm to 500mm (1/4″ to 9″) at test speeds up to 400 fpm, depending on the size and condition of the test material.


Rotary Mechanics for Flux Leakage Systems
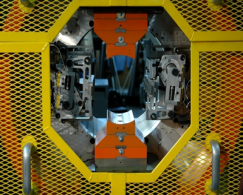
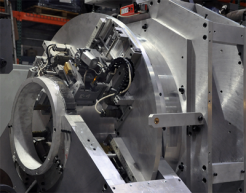
Flux leakage test systems incorporate rotating test probes, mounted in a rotary headplate assembly. Current systems are available to handle up to 500mm  diameter and 19 mm (3/4″) wall thickness. Picture shows the headplate with test probe assemblies and magnetizing pole pieces for detecting longitudinal defects. Rotary mechanisms designed for detecting transverse defects are also available.
system


TEST BENCHES & DRIVES

“V” Roll Test Benches
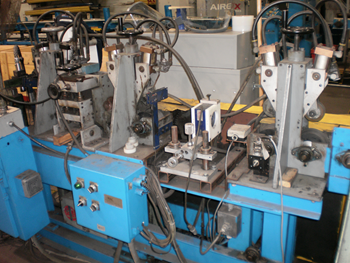
The various coil platforms and rotary mechanics described above can be mounted on a MAC test bench which aligns the test material with the test sensors. MAC’s standard test bench utilizes 120 degree “V” rolls and pinch stands to support and position the test material. The fixed bottom “V” rolls, in conjunction with a flat top roll, provide 3 points of contact and ensure firm support for the test material, eliminating vibration that can cause false indications. Automated or manual controls adjust the pinch stand rolls to the size of the test material. Drive Mechanisms provide forward movement of the test material through the coil platforms and rotary mechanics where needed. Individual elevating platforms are usually included on the test bench for positioning larger rotary mechanics. 90 degree rolls are also available for square material. Auto diameter controls are available to automate adjustments of the testers and drives when the test material diameter is changed.
“V” Roll Pinch Stands
Automated or manual Pinch Stands help eliminate vibration that can interfere with the test, and ensure that the test material is properly positioned as it enters and leaves the test sensors. Pinch stands can be mounted on a test bench, or directly on a production line.
Constant Center Triple Benches
MAC’s subsidiary M A Nordic offers a constant center, automated triple drive and table to accommodate several testing systems, including stationary or rotary eddy current, flux leakage, or ultrasonic instruments. A constant center triple drive roll bench is another option for mounting the various mechanical components for MAC test systems. The bench eliminates vibrations from the test material that can cause false reject signals. A triple pinch is mounted between each test station on the bench. Each pinch, driven by a separate AC motor, uses three hardened steel rolls to center the test material. A frequency converter controls the AC motors to guarantee equal speed for all of the pinches. Slide mechanisms are available to allow access to test heads for off line setup and maintenance.A single point adjustment of the table and diameter of the triple driving and centering guide aligns the table and testers with the production line. It is especially applicable to products such as tubes with badly formed ends, upset pipe or difficult straightening applications.

FEED SYSTEMS

Modular Design
The Feed System’s modular design permits quick assembly into many configurations to handle various lengths of material, and allows for later additions or changes. Both round and hexagonal material can be accommodated. Models are available for handling bars or tubing ranging in size from 1/8″ (3.18mm) up to 7-1/2″ (191mm).

Typical Application:
  • Automated feeding, rejecting and handling of bars and tube in ndt test stations.

Multiple & Custom NDT Systems

Multiple & Custom NDT Systems

MAC offers large, automated multiple test systems that combine different NDT technologies and controls to provide a totally automated, integrated inspection system. By combining different tests, such as eddy current, ultrasonic and/or flux leakage in one system, each technology detects the conditions that it is best suited to find. The result is a superior inspection system, designed to meet the exact specifications of the tube, wire or bar mill and their customers.

Typical multi test systems to inspect welded steel tube might include:
  • Echomac® rotary ultrasonic test for detecting transverse and longitudinal flaws, wall thickness and ID/OD dimensions.
  • MultiMac® eddy current test for detecting weldline defects
  • Varimac® electromagnetic comparator to check grade
  • Demagnetizer to eliminate residual magnetism from the eddy current test
  • Automatic markers
  • Test Bench
  • Drive mechanisms
  • Conveyor system for incoming and outgoing material, including feed racks, stop arms, accept and reject pockets
  • Water chiller and recirculation system for UT test
Using MAC’s “Learn Drive”, “auto-diameter” and other control features, the system can “learn” the diameter of the material, the production line speed and other characteristics, and program itself to automatically time the activation of the test probes or transducers and the operation of the mechanics which position and move the test material through the inspection process. This allows for highly automated non-destructive testing in an industrial environment. Contact MAC at contactus@mac-ndt.com to have a Field Engineer visit your plant and discuss an integrated, automatic inspection system for your product.

CUSTOM SYSTEMS

MAC’s experienced Mechanical Engineers and Research and Development Engineers have designed a number of custom NDT inspection systems for specific applications. Once approved by the customer, the design is manufactured, installed and checked out by MAC in the customer’s plant. MAC’s subsidiary in Sweden, M A Nordic also has many years of experience in designing and building complex systems for a number of NDT applications.

Ultrasonic Test Systems

Ultrasonic Test Systems

ULTRASONIC TESTERS TO DETECT SURFACE, SUBSURFACE AND DIMENSIONAL FLAWS

These ultrasonic NDT methods will indicate material defects such as longitudinal and transverse cracks, inclusions and others as well as ID/OD dimensions and dimensional changes such as thickness and ovality.

ECHOMAC® ROTARY
Transducer Assembly

High speed ultrasonic rotary testers provide multiple test configurations for tube or bar up to 500 millimeters in diameter.
ECHOMAC® Rotary Ultrasonic System Rotating ultrasonic transducers are available for shear-wave configuration (surface and subsurface defects) and compression-wave configuration (internal defects and dimensional measurements such as wall thickness.) Models are available for inspecting material from 10 mm to 360 mm in diameter at test speeds up to 200 fpm, depending on the size and condition of the material. Rotary ultrasonic systems can be combined with eddy-current instrumentation to meet API, ASTM, Mill, and Customer specifications.

Typical Application:
  • Used with FD-5 electronics for non-destructive testing of bars, tube and Pipe.

ECHOMAC® FD-5
Multi Channel Ultrasonic Tester

The Echomac FD-5 is a computer based ultrasonic inspection instrument designed for on or off-line flaw detection, thickness and outside diameter measurement.  Instead of using common spike pulsers, the FD-5 uses negative square pulsers lower in amplitude and longer in length coupled with a pitch-catch through transmission to fully optimize transducer efficiency.  Building on the success and wide acceptance of the Echomac FD-4, the FD-5 achieves a new level of improved signal to noise, repeatability and reliability.  Improved 16 steps damping adjustments in increments of 20 Ohms, instead of the common 2 step high or low adjustment, allows the transducer to detect lower signals while giving the user better control over reflections.  With a higher gain range and the addition of 5 low pass filters and 5 high pass filters, noise is significantly
suppressed, thus improving reliability and repeatability.  Zero cross-talk optimizes signal integrity and provides precise thickness measurement.

Typical Application:
  • Flaw, thickness or ID diameter detection on or off line, for tube, bar, or plate. Well suited for new or older installations in need of upgrading, the FD-5 instrumentation can be used with MAC’s Echomac Rotary Ultrasonic Transducer assembly as well as with other existing immersion or squirter type “spin the tube” installations.


Flux Leakage Inspection Systems


Flux Leakage Inspection Systems


Untitled1FLUX LEAKAGE ROTARIES

Magnetic Flux leakage (MFL) non destructive test systems accurately detect defects in heavy-wall magnetic tubing, including oil country tubular goods (OCTG), bars, and parts. Systems are available in sizes to handle up to 500 mm diameter and 19 mm wall thickness tubes. Transverse and Longitudinal rotaries detect surface defects as small as 5% on OD and 5% on the ID as well as defects within the wall, depending on material type and condition can be detected


2

ROTOFLUX® ELECTRONICS

The electronics are capable of differentiating between ID and OD defects, using a unique multiprobe feature which allows convenient operation at greater speed. A flux measurement circuit is included to indicate whether the test piece is properly saturated. To detect longitudinal defects, the material under test is driven through rotating headplates that include transverse magnetizing coils and test probes.MAC also offers Rotoflux systems to detect transverse defects where the magnetizing poles are placed in a fixed position perpendicular to the axis of the material under test, and the sensors are rotated around the test piece.

Eddy Current Inspection Systems

MAC EDDY CURRENT PRODUCTS

MAC eddy current inspection systems incorporate computer based test instruments and test coils. The test coils interact with the material under test and provide data which is processed and analyzed by the instrument. MAC uses two general types of eddy current test coil technologies: Encircling and Sector Coils, and Spinning or Rotary Probe Coils.

ENCIRCLING AND SECTOR EDDY CURRENT COIL TESTERS

WORDPRESSIn encircling/sector coil technology,
the product under test passes through
or adjacent to an electrical test coil which
has been excited by an alternating current.
This induces a flow of eddy currents around
the test material, or, in the case of a sector coil, in the area under the coil. Short, intermittent anomalies or flaws cause a variation in the eddy current pattern which the instrument detects.
Absolute, differential, or combinations of both coils are available.

Typical applications for encircling/sector eddy current test sensors are:
  • Detect short surface and some subsurface defects, on or off-line, in magnetic and non-magnetic wire, bar and tube
  • Inspect welded tube for short ID or OD defects in the weld zone or on the full circumference
  • Test uniform cross sectional material, including squares, rectangles, hex and round
  • Inspect small diameter wire or tube for short defects
  • Check continuity and locate welds in single and multi-conductor insulated wire and cable

EDDY CURRENT ROTARY PROBE TESTERS

In rotary probe technology, the product under test moves longitudinally through the rotating test probes resulting in a helical search pattern. As the probe passes over a defect, variations in the induced eddy current pattern are detected. The minimum flaw length which can be consistently detected is a function of the rotary speed of the probe and the throughput speed of the material. Similar results can be obtained by holding the test probe stationary and rotating the material past the probe.
    Untitled
  • Continuously variable high speed rotaries (1800  6000 RPM)
  • Multi-probe headplates to detect shorter defects without sacrificing throughput speed
  • Rotary testing is the method of choice for detecting seam type surface defects in non-magnetic and magnetic grades of wire and bar
  • Rotary mechanics for up to 7-1/2 inch (191mm) diameter material
  • The MultiMac eddy current instrumentation operates with MAC rotaries where long, continuous defects may not be adequately detected by encircling test coils
 
Typical applications for rotary test sensors are:
  • Detect seam type surface defects in cold drawn wire or cut length bar stock
  • Inspect in line with continuous wire operations such as wire drawing, parts forming, re-spooling, or straight and cut
  • Inspect cut lengths, usually off-line
  • Test parts, such as small shafts and bearings for longitudinal surface defects

MAC Eddy Curret Equipment

 
MULTIMAC


 MINIMAC


PROMAC